Before creating activities using JClic author you must start by creating a new project, or open a previous one. The finished project consists of a group of activities, its links and all the multimedia resources which have been employed in it.
The projects can be created using JClic author. When you start making them you must specify:
- The name of the file where the project will be saved. This file will have the double extension .jclic.zip. The programme automatically assigns the same name to the file as the project, replacing if necessary problem characters for others which make it easier to find in Internet or in any operative system
The name of the file should not contain accents or spaces or be too long as later this could cause problems when you want to post it on the Net. If the name of the project is not adequate, the programme will transform it automatically
The files .jclic.zip use a standard ZIP format. They can be opened with any tool which supports this type of document e.g. Winzip or 7zip, but it is recommendable to handle them using JClic author.
- The folder where they will be automatically saved is:
C:/Programme Files/JClic/projects/name of project (in Windows)
$home/JClic/projects/name of project (in other systems)
JClic author creates the folder automatically. It is advisable to save all the resources that will be used in the project in this folder. .
Once the new project has been created there is some information that it is advisable to specify before creating the activities. This information can be modified later. e.g. the name and description of the project, information about the author, level ,subject and language/languages used. Some aspects of the user interface can also be configurated here like the skin and sounds of events.
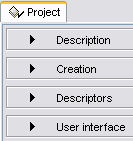
All this information is introduced through the tab Project in JClic author.

This tab contains 4 sections.

- Description
Contains the boxes where you write the title and description of the Project.
The Description box is where you write a short explanation on the content of the project. This section is very important as it helps to form an idea of the objectives and content of the activities. The description will be shown to the students who do the activities via one of the menus on the screen when they activate the button "JClic.
|
|
- Creation
This contains the boxes where you introduce the author´s name and other personal information, data on the centre which has participated and the date of creation and modifications.
It is advisable to add another line in the section Revisions when you make any type of significative modification in the original project e.g.when you make important modifications in a project made by someone else.The objective of this register is to elaborate a list of the different people who have taken part in the project and what exactly they have done.
|
|
- Descriptors
Contains the boxes where you introduce the information on the levels, educational cycles and areas to which the project is directed, on the descriptors and also the languages used.
|
|
- User Interface
From here you can define, if you wish, the skin i.e. the frame for the project, and decide if you want to change the sounds of events from the pre-defined ones.
.
|
|
|