|
||||||||||||||||
| Practice session |
|
|
|
|
|
|
Exercises
|
|
||||||||
| Installation of JClic projects | |
| In this practice session you will create an installation file from the sequence of activities created in module 4; the sequence of text activities. | |
| |
From the menu File | Open file..., go to the folder module4 and open module4.jclic.zip. In the last practice session you made copies of the files created in the modules and put them all in the same folder (modules). So now you must be careful to open the work from module 4 and not anything worked in later practice sessions. From the tab Project, observe that the Title is module 4. Add: course D73. In the section Creation, write your name as author of the project. Save the file module4.jclic.zip and then reopen it. You must make sure that you have the latest update saved before creating the installation file.
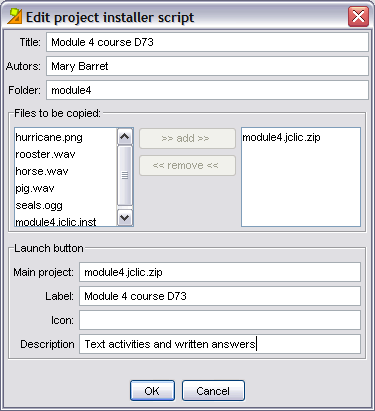
When you reopen the file module4.jclic.zip, you don´t have to go to any special tab.The creation procedure for the installation file is an operation that is external to the project. Go to the menu Tools | Create project installer... In the document you saw that there is information to be filled in about the project. In your case you have the following window:
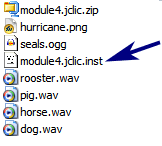
The title, author and folder are already filled in. These can be changed if necessary. In files to be copied, modulo4.jclic.zip appears. In the Start button, the information is already there. As you have not designed an icon, do not fill this in. The Description can be added: Text activities and written answers. Press OK. The dialogue box opens to ask you where you want to create the installation file module4.jclic.inst. As this is the folder which you have selected, save it. Test, from Explorer, that this file has been created in the folder module4:
If you want another user to use your project, installing it on their hard disk and creating an icon in the JClic library in their computer, you will have to send them both files:
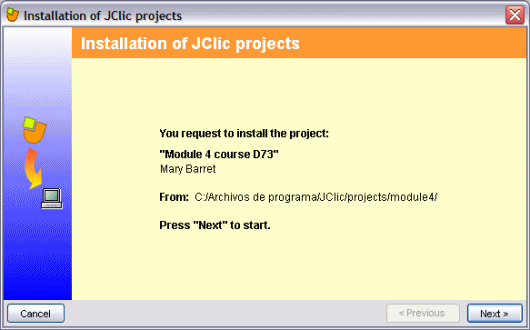
So as there are no problems, copy both files into a new folder. Open JClic and look for the folder where you have the files. Open the dropdown list of files and select:
module4.jclic.inst. When you accept, the installation assistant for JClic projects will appear:
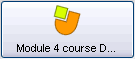
Follow the steps as you did in practice session 1 module 1 when you installed the example activities. Once finished your JClic will have another icon:
Test using the start button. |
| |
|